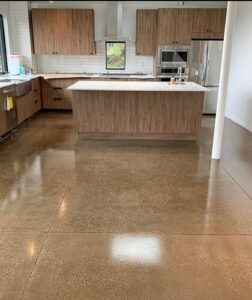
Concrete is very durable, sensible, and is very versatile. While the simple gray color may not be for everyone, there are a few things you can do to liven it up, improve and alter it, and add some personality to its otherwise cold feeling.
If you’re feeling underwhelmed by your garage’s, basement’s, or patio’s lackluster concrete floors, consider refreshing the space by painting them! Here’s how you can transform your drab concrete floors in three easy steps.
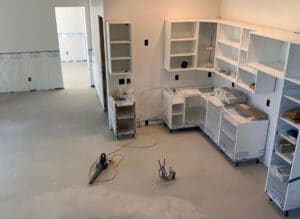
1. Prep the Concrete Surface
Preparing the surface of your concrete is a very important step and should not be skipped or rushed. Paint won’t hide the imperfections of your concrete like a bumpy texture or cracks, so they must be addressed before the paint job. A smooth and clean surface is ideal and what you should aim for before you begin painting your concrete floors.
To achieve the ideal surface for your concrete, you may need to break out a scraper. Any gunk or residue like dried paint spills or adhesive splatters needs to be scraped away for a smooth surface. So you don’t throw out your back and for easier scraping, try a scraper with an extended pole.
Once your floors are smooth, it is time to clean the surface. It’s important to remember that paint will only stick to clean and dry surfaces. Rid the space of dirt, dust, old concrete pieces, and anything you scraped up by sweeping or vacuuming your concrete floors. To cleanse your floors, you may want to consider a degreasing cleaner. With the right gear (gloves, goggles, and clothes that will protect your skin), a cleanser, and a push broom, you can get those floors in paint-ready condition. For tougher areas (like those with rust), you may need to break out your wire brush along with some elbow grease.
Lastly, in prepping your floors, you need to make sure your concrete is rid of any cracks. To do this, fill the cleaned-out cracks with a crack filler from your local hardware store and scrape away the excess. Once the filler has dried, smooth it out with sandpaper. Be sure to vacuum up the dust.
2. Prime and Paint the Floors
Some DIY-ers choose to skip priming floors. But, priming before painting helps ensure your paint will stick, so it’s worth your time. Make sure your primer works with concrete and epoxy paint. Epoxy paint is your best option for painting concrete floors as it is very durable and stands up to traffic and wear and tear your floors are bound to see. When choosing your primer and paint, make sure it’s suitable for the location of your floor (indoor vs. outdoor).
Once your floors are completely dry, you’ve taped off anything that needs taping, and you have all your supplies and tools, you can add your primer to the floor. Just make sure you don’t paint yourself into a corner!
When your primer is 100% dry, you can add your paint. Epoxy paint comes in two parts. Be sure to follow the instructions carefully. Add your paint to the floors; multiple coats may be necessary to achieve desired results.
3. Seal the Floors
You can stop here if you want, but if you’re wanting the best, long-lasting results, you should apply a sealant after your paint dries. Verify your sealant is, again, suitable for the location of your floors (indoor vs. outdoor) and that it works with the epoxy paint you’ve chosen. For best results, make sure to follow the instructions on your sealant for humidity, ventilation, and temperature.